Hamwih

Battery Monitor Display

Some time ago I bought a Victron BMV-712 Smart battery Monitor.

It is possible to see the various measurements

* State of Charge * Voltage * Current * Power
* Consumed Ah * Time Remaining & * Starter Battery.

by pressing the ‘+’ or ‘-‘ buttons and scrolling through the display or linking, via bluetooth, the monitor to a smart phone and looking at the figures on screen.

Useful, but you do need to have the phone handy.

Recently I came across a couple of old phones (put in the back of a drawer when I upgraded) and it occurred to me that I could set one of them up as a permanent display. The only possible problem would be how to power the phone, fortunately the Solar Power MPPT controller came with a USB port.

Some double sided tape and feeding the USB cable behind the Eberspacher controller and the phone becomes a permanent display for the battery monitor. A very useful role for a redundant mobile phone.
Hamwih

Stove top re-paint

Slight water ingress caused top of stove to rust. Mainly light surface rust, but unsightly.

I couldn’t find anywhere obvious for the leak, but resealed where the chimney entered the boat roof.

I then sanded down the stove top and repainted.

As good as new.
Hamwih

Update to Installing Solar Panel – Extra Fans

When the solar panel was first installed a single fan in the saloon was also fitted.

Recently I bought two more computer fans and have now installed a fan in the galley and one in the bedroom.

PC Fans


I also used some switches I had left over from a 2015 job (on Notos)

Each fan now has an independent switch and can be operated separately. All three fans together draw less than 0.7ah and automatically switch off if the battery voltage drops to 12.5Vs and won’t switch back on until the voltage reaches 13Vs. Whilst not on the boat they are only set to work during day light hours, thus effectively using surplus power generated by the solar panel.

Hamwih

Remote Battery Monitor & Boat Tracker

During the lockdown I have, like most leisure cruisers, been unable to visit my boat. It is moored about 30 minutes drive way from the house. Although since fitting the solar panel in November 2018 I have not had to worry about  the batteries draining, it would have been reassuring to know that there were no problems.

In this months (June’20) Waterways World a reasonably priced Remote Battery Monitor was advertised. It also has the advantage that it sends location information along with the battery charge.

I’ve ordered one from the manufacturer ChargeMetrix (£42.50 + a monthly connection fee of £3.99) and will install it once the lockdown is ended and I am able to visit the boat again.

Although it’s too late for the Coronavirus lockdown it will be convenient to keep an eye on the battery charge in the future and if ever the boat is stolen be able to track it.

Hamwih

Solar Panel Effective?

The solar panel has been installed for three months now, probably the ‘worst’ period of the year for generating electricity (November through to January).  Below is a table which slows how effective it is in keeping the batteries charged.
As a matter of routine I keep a record of the battery voltage and mostly record the figures each time I visit the boat. The table below shows the eleven visits prior to the solar panel being installed and the eleven afterwards. I’ve only shown the battery voltage at the start of each visit, before running the engine and only on the occasions when the boat had been moored, unattended, for at least 3 days.
At first glance there doesn’t seem to be much difference, but for the eleven visits prior to the Solar Panel the batteries were lower than 12.7 volts on 8 occasions out of 11. After fitting the solar panel the batteries were higher than 12.7 volts on 9 occasions out of 11.
The average reading for the visits is also higher after fitting the panel, not by very much, but enough to show that despite there only being winter sun available the battery is kept topped up.
                                                                             

Domestic Battery Voltage
Before After
12.82 12.73
12.64 12.85
12.62 12.73
12.67 12.80
12.71 13.05
12.57 12.53
12.67 12.89
12.74 12.70
12.76 12.95
12.20 12.85
12.44 12.88
Average 12.62 12.81
Hamwih

Installing Solar Panel

Installing the solar panel the first step is to select a location and then temporarily run the cables to make sure they are long enough. The picture below left shows the covered solar panel in the preferred location, just past the plank & pole bracket.


I am also installing a fan in the saloon roof vent, to run from the ‘load’ connections of the charge controller. The cable for this can be seen in the picture on the right going into the roof vent.

After finalising the  position for the Solar Panel I attached the cables to charge the batteries (domestic bank & starter battery) and the battery temperature sensing wire. I then ‘ran’ them through to the electric cupboard

The picture to the left shows the approximate location of the battery & temperature sensing wires in the electric cupboard.

The picture to the right shows the Solar Panel & fan cables hanging down from the roof. Which clearly shows that there will be sufficient length to reach the charge controller in the electric cupboard.

After making sure the cables were long enough the next stage is to drill holes in the roof for the Fan & Solar Panel Cables.

Cables being fed through holes.

Followed by feeding the cables through the holes

View from inside the roof.

Cables being fed along roof space and
down into electric cupboard.


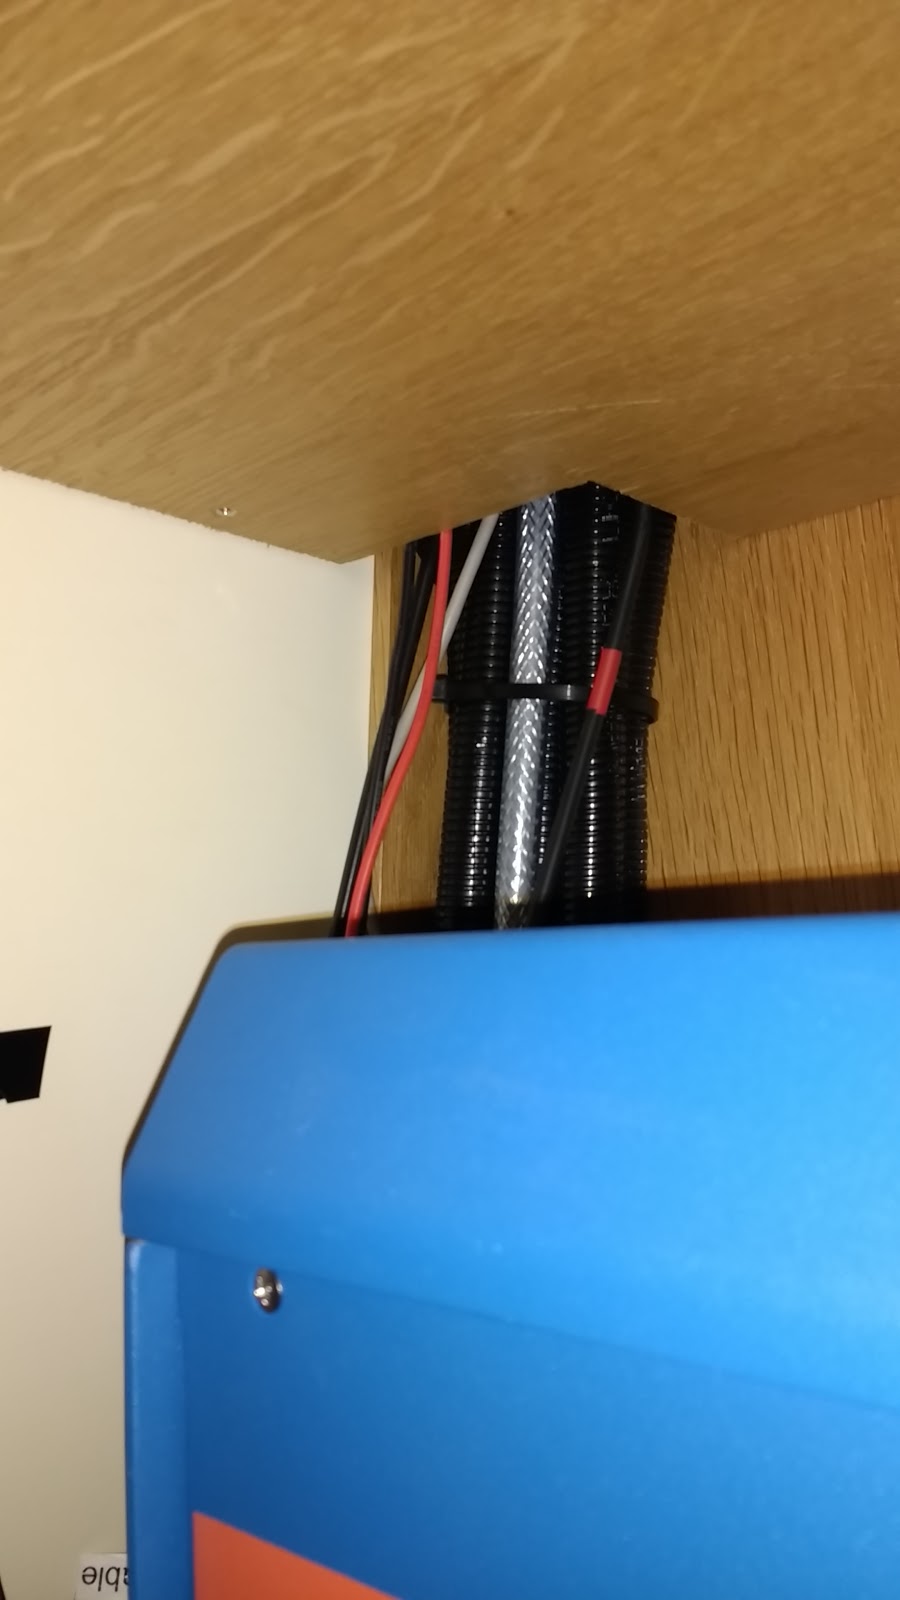
The cables were then fed along the roof space and down to the electric cupboard. Its the two thicker black cables (solar panel) and the red & black thinner cables (Saloon Fan)

Cables as they emerge from
roof space into electric cupboard.
The next stage is to site the charge controller. The picture to the left shows the first position and the various wires. From left to right these are 1) Temperature sensing wire, 2) Positive & Negative cables from the Solar Panel, 3) Positive & Negative charging cables for the domestic battery bank, 4) Positive & Negative charging cables for the starter battery & 5) The Positive & Negative cables for the fan.

I thought placing the charge controller in this position would be a bit unsightly with all the cables running up to it.

The charge controller in its final position

The box to the left is the BlueTooth which enable me to view the various statistics on my phone.

A fuse was inserted into the positive cable for the fan. The shuts down automatically if the battery level falls below 12.5 volts and is not switched on again until the battery reaches 13 volts. This fuse, with a switch means that I can also manually swith the fan on or off.

The final job was to cover the wires on the roof with some plastic conduit and stick down the entry gland.

Hamwih

Solar Panel

About to a fit a 150W solar panel and MPPT Dual Battery Controller.


WRM15 dualB/dualB-E is an MPPT charge controller for PV applications with two batteries automatic charge management, with Bluetooth connection and Android/iOS APPs to manage and monitor the PV system.
Solar Panel Specs.


Hamwih

Anchor Bracket

We are due to have a cratch cover fitted which means that the anchor currently stored in the bow well has to be moved. 


Spoke to Oxley Marine about fitting a bracket to the stern and this is is the result.